
How to use maps and pins in Lore?
Did you know that you can add maps directly in Lore ? Our worldbuilding software also includes a pin system for marking important locations,such as cities!
Maps and pins aren't just tools - they're the key to creating a living world for your players . Find out now how to use your own map, set your pins, name them and link them to your template pages.
Create a page map
To get started, launch the Lore software on your computer. Open an existing Lory or create a new one. If you're using this tool for the first time, take a look at the tutorial on how to get started with Amsel Suite .
After opening a Lory, click on “ New Map ” in the palette on the right of your screen.
Add a new map
The map must be added as an image from your computer files . Many import formats are available, including PNG, JPEG and WEBP.
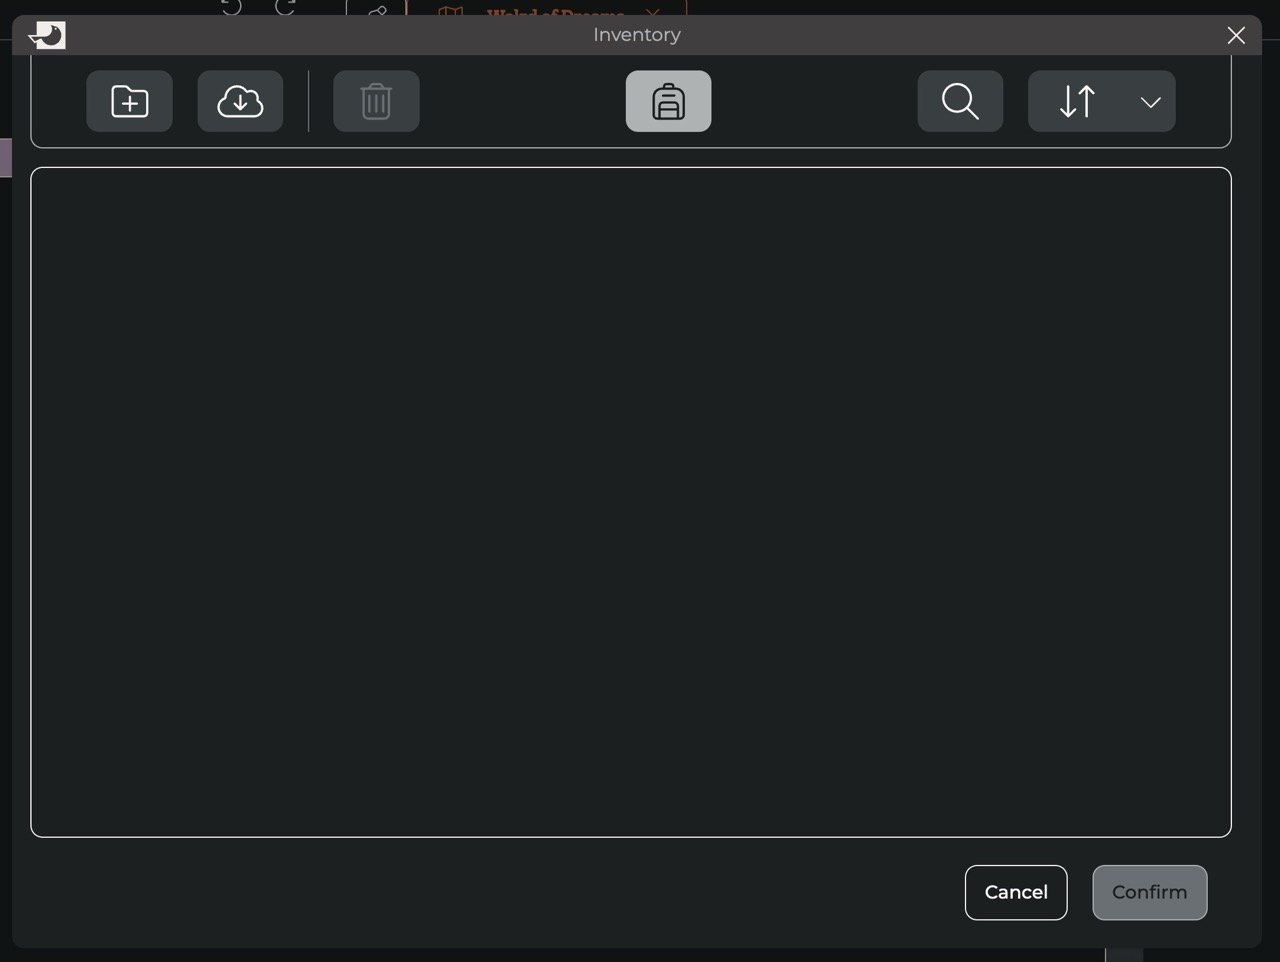
From the menu above, you can add your own map in the software by clicking on “ New Map ” and then on the cloud with an arrow at the top left of your screen.
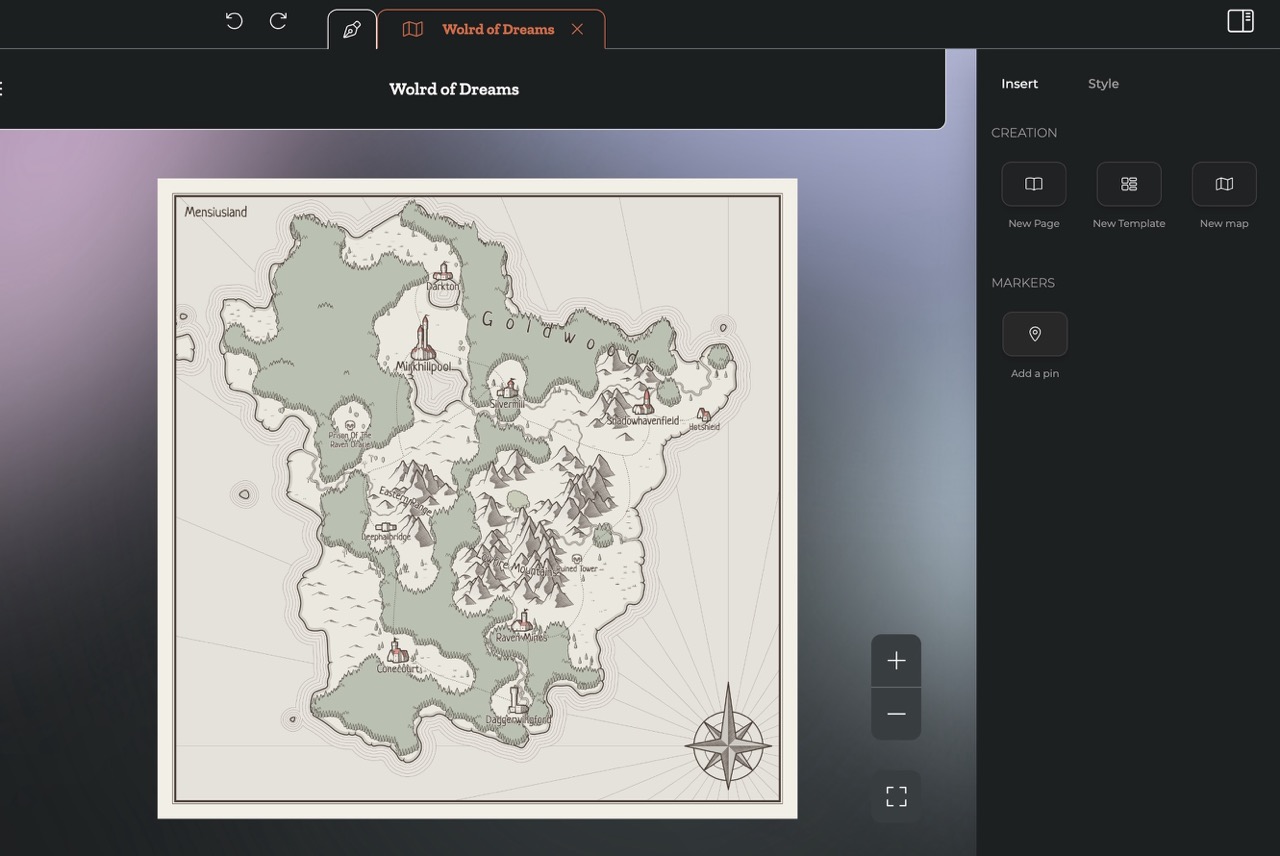
Your map is now imported into the Lore software. Zoom in , zoom out or center your map using the icons at the bottom. The map below was generated using the Watabou tool .
Add some pins
Now it's time to add pins ! You can choose different colors to highlight the items. Each pin you create can be linked to a page . This means you can, for example, explain the history of a town, a region or a character living there.
Click on “ Add pin ” on the right-hand side of the menu and place it wherever you like . Click on it again to move it anywhere you like.
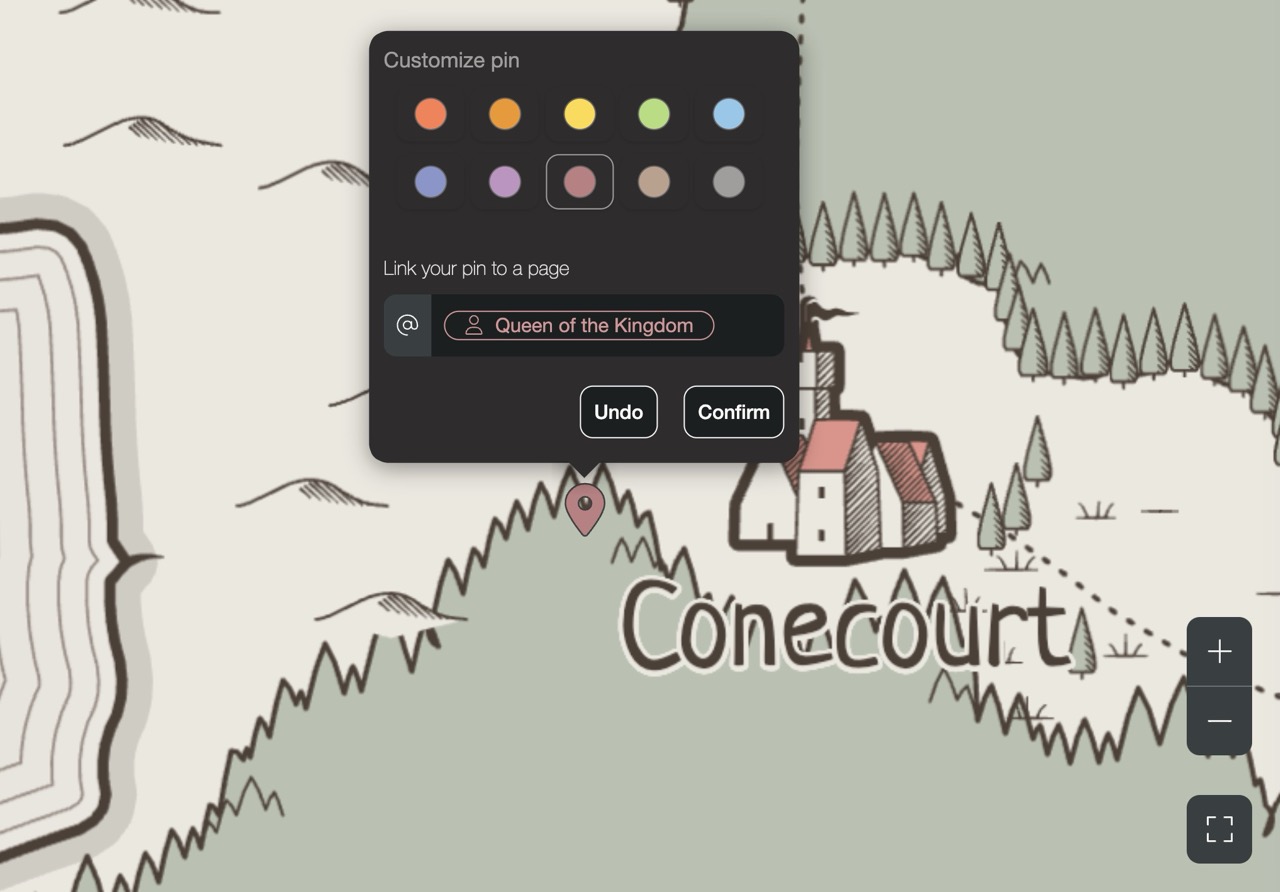
This easy-to-use editing mode is perfect if you're working on your Lore universe and want to modify things quickly.
When you launch your RPG session , you'll be able to easily move around your map and access pin-related pages.
By mastering maps and pins , you can transform your static world into an interactive, evolving adventure. Whether guiding players through landscapes or uncovering hidden secrets, every pin tells a story !


